Distributing apps
In this tutorial we will cover the steps to publish your Processing sketch as an app in the Google Play store.
Before packaging the app for release, it is required that you set the icons for your app, wallpaper, or watch face, because Processing will not use the default generic icons for the release package of your app. It is very important that you also choose a package name that will uniquely identify your app in the store.
Setting custom icons
Android mode uses a set of default launcher icons for the app. You should use your own icons for release by creating the files icon-36, 48, 72, 96, 144, and 192 in .PNG format, and placing them in the sketch's folder before exporting the signed package. Follow the icon design guidelines from Google in order to create your icons.
If you are creating a watch face, you also need to provide the files preview_circular.png and preview_rectangular.png, which will be used to show a preview of the watch face in the Android Wear companion app that runs on the phone, or in the watch face selector on the watch. The resolutions of these icons are 320x320 for the circular preview, and 280x280 for the rectangular preview.
Setting version and package name
The package name is a string of text that often looks something like "com.example.helloworld", and follows the Java package naming convention where the app name ("helloworld") is last, and preceeded by the website of the company or person developing the app in reverse order ("com.example"). Processing constructs this package name automatically by prepending "processing.test" to the sketch name. You can set your own package name by editing the manifest file that Processing generates in the sketch folder after you run it for the first time from the PDE (either on a device or in the emulator). You can also set the version code and version name. For example, in the following manifest file, the package name is "com.example.helloworld", version code 1, and version name 0.5.4:
<?xml version="1.0" encoding="UTF-8"?>
<manifest xmlns:android="http://schemas.android.com/apk/res/android"
          android:versionCode="10"
          android:versionName="0.5.4" package="com.example.helloworld">
    <uses-sdk android:minSdkVersion="16" android:targetSdkVersion="26"/>
    <application android:icon="@drawable/icon" android:label="">
        <activity android:name=".MainActivity"
                  android:theme="@style/Theme.AppCompat.Light.NoActionBar.FullScreen">
            <intent-filter>
                <action android:name="android.intent.action.MAIN"/>
                <category android:name="android.intent.category.LAUNCHER"/>
            </intent-filter>
        </activity>
    </application>
</manifest>
Note that the package name of you app is unique, since there cannot be two apps on the Google Play store with the same package name.
Creating the signed app package
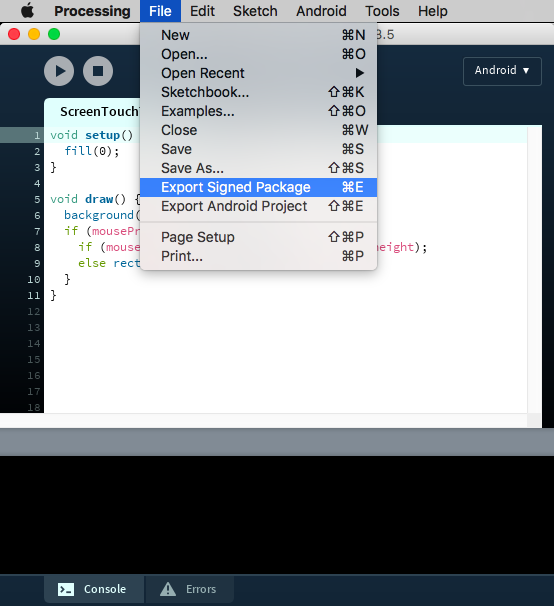
The Android Mode simplifies the publishing of your sketch by signing and aligning the app, so you can upload it to the Google Play Developer Console without any extra additional steps. All you need to do is to select the "Export Signed Package" option under the File menu:
After selecting this option, Processing will ask you to create a new keystore to store the release key to sign the app package:
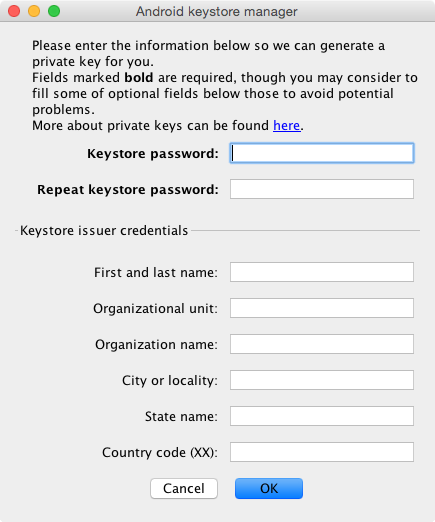
Remember this password, as you will have to use it every time you export a new signed package. Even though you can reset it and create a new key, as long as an app is identified with the same package name, it has to have the same release key.
The signed (and aligned) package will be saved in the build subfolder inside the sketch's folder, under the name [Sketch name in lowercase]_release_signed_aligned.apk. Once you have generated this file, you can follow the instructions from Google to complete the publishing process of your app on Google Play.